Enter Live
Open the performance screen with LIVE and return with EDIT. SCENE, STOMP and HYBRID stay in the same position across modes. The normal Live screen does not repeat the interface name.
SCENE · switch song sections
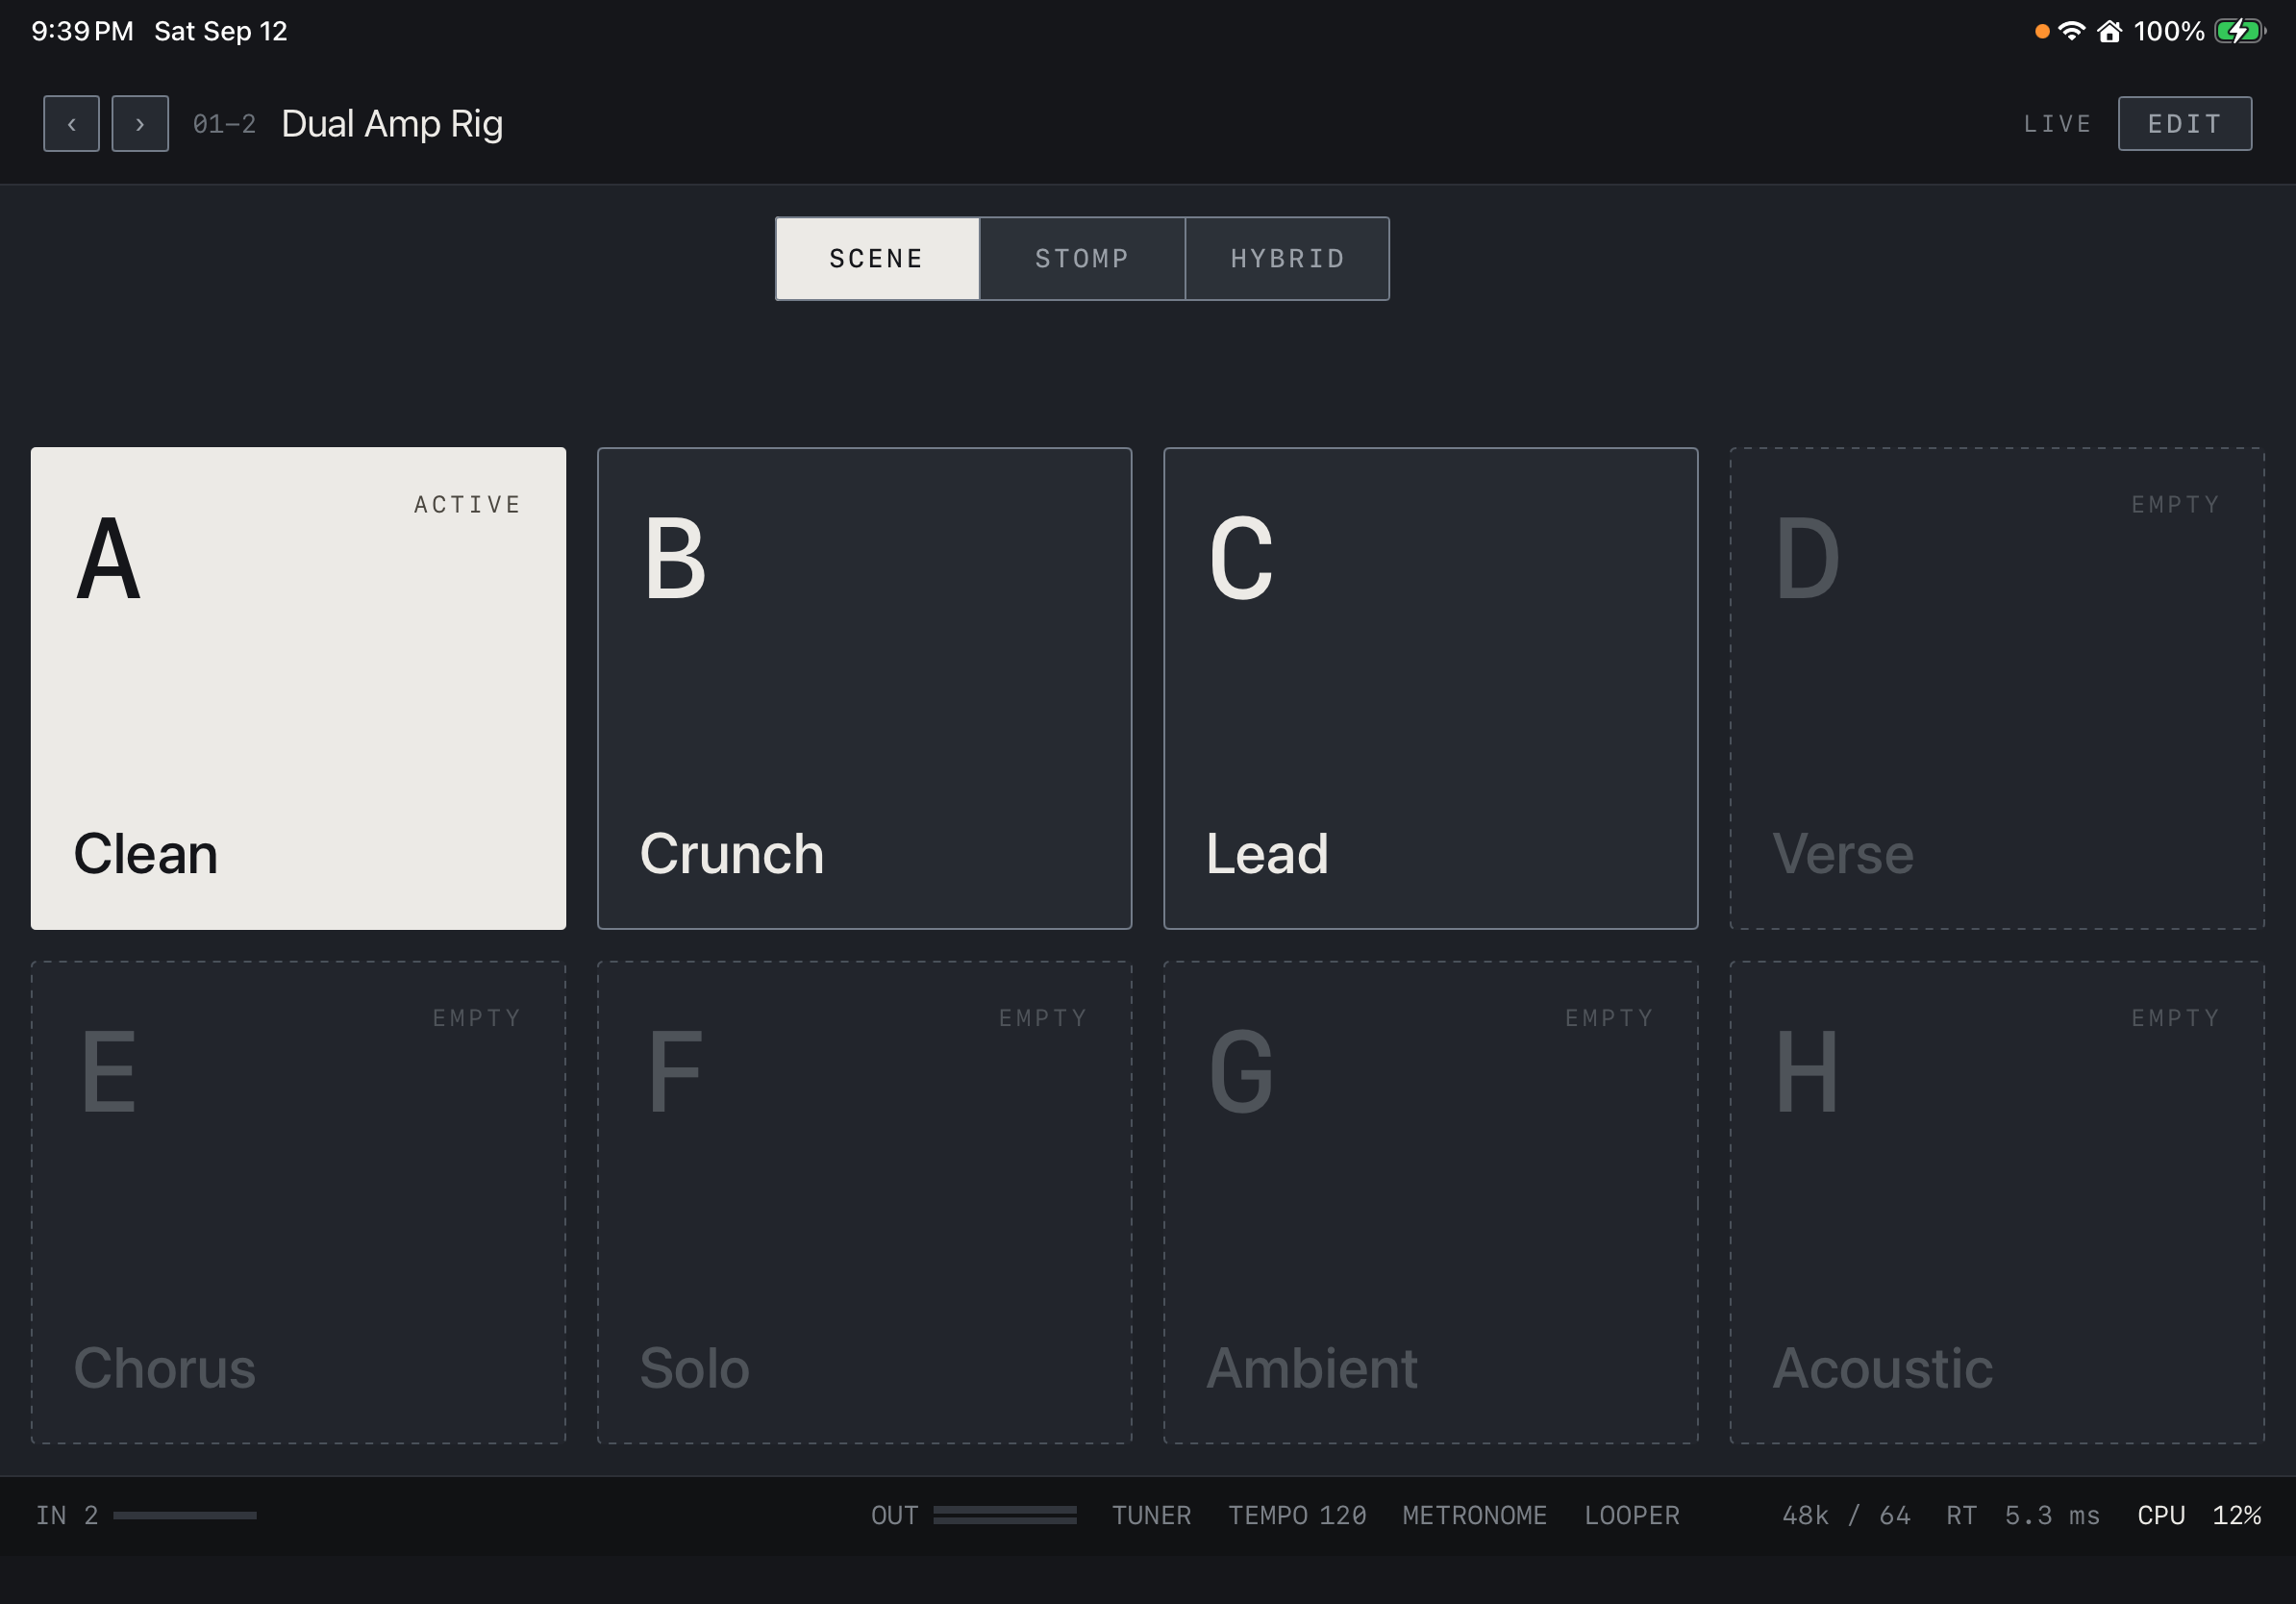
SCENE presents eight large buttons, A–H. Tap to recall states such as Clean, Crunch and Lead that you stored in the editor. ACTIVE marks the current scene; EMPTY marks an unstored slot. First return to EDIT, adjust block On/Off states and parameters, hold a scene button to store the state, then save the preset. Return to LIVE → SCENE and try the transitions in your playing order.
Find it on screen
- Select SCENE at the top. The mode selector stays in place.
- Use the large A–H buttons to recall saved scenes. Store empty slots in EDIT first.
STOMP · switch individual effects
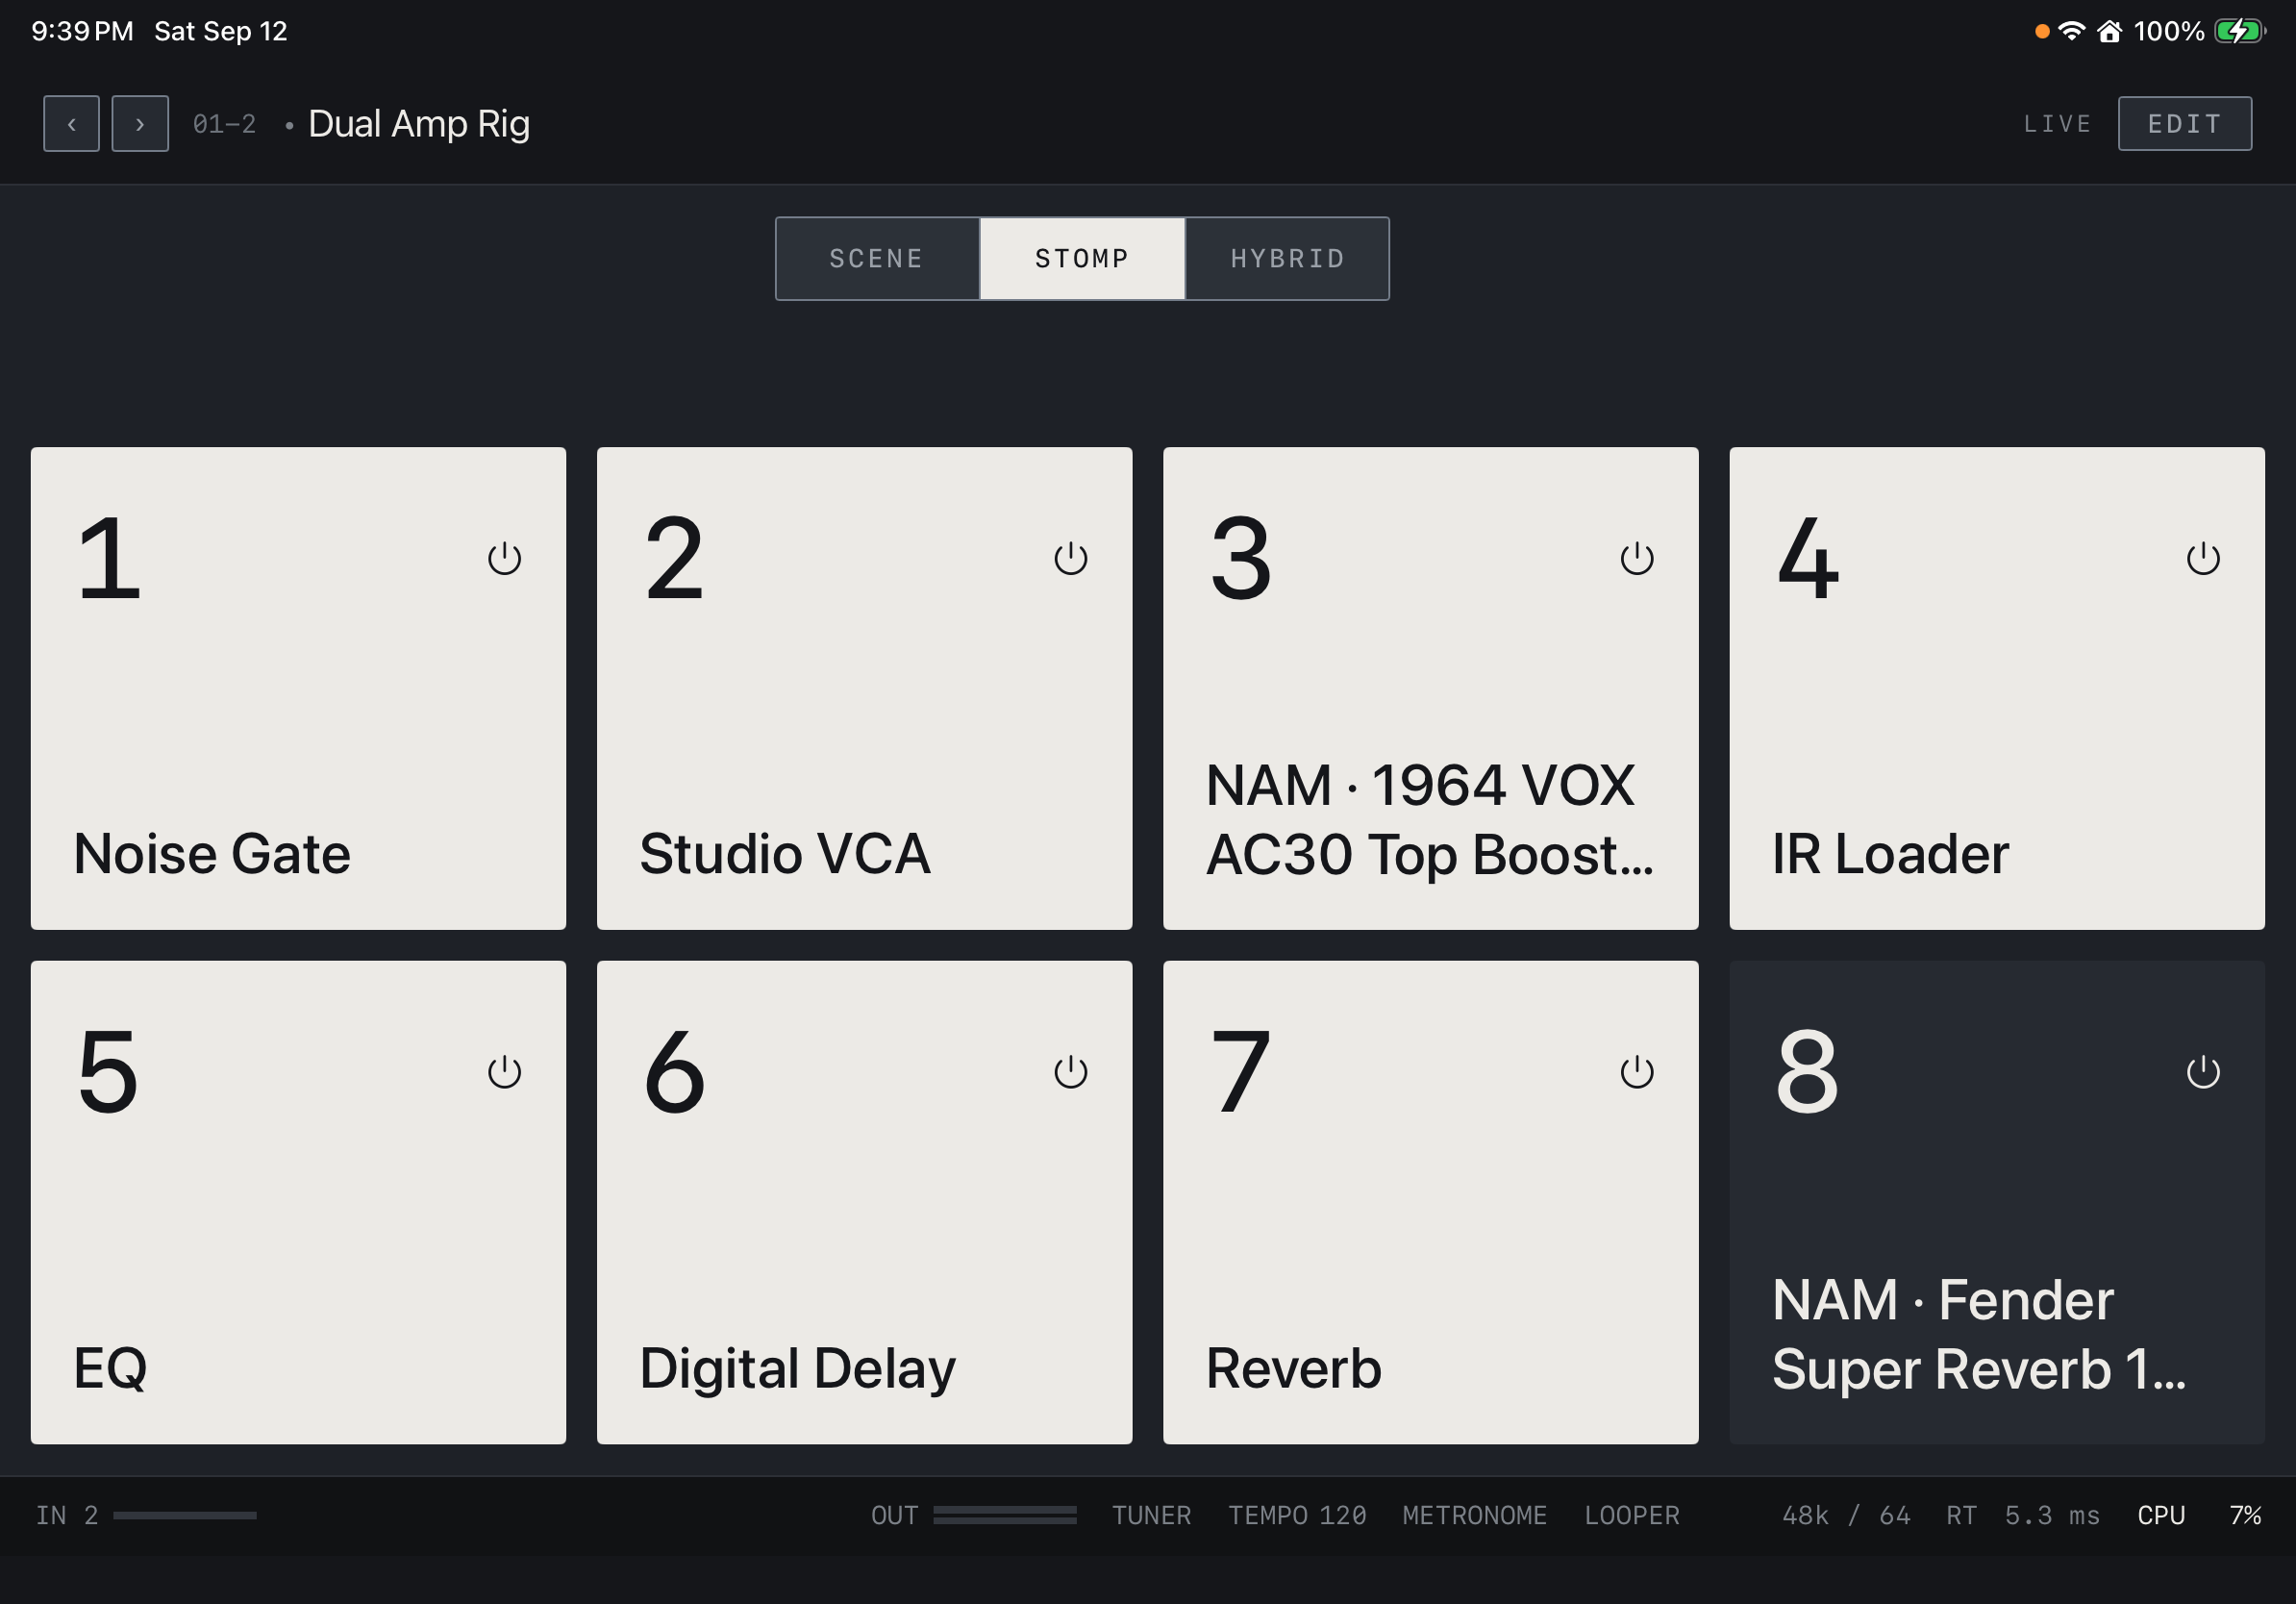
STOMP works like a pedalboard. Read the block name below its number, then tap to enable or bypass that effect. Light buttons are on; dark buttons are off. Use it to add only a delay or bypass only a drive within the current scene. Assigned MIDI CC numbers also appear on the buttons.
Find it on screen
- Select STOMP at the top and read the effect name at the bottom of each button.
- Light buttons are on; dark buttons are bypassed. A CC number indicates a MIDI assignment.
HYBRID · combine both controls
Choose HYBRID when you need scenes and individual effects together. It places four scenes above four stomps. Use A–D / E–H beside the mode selector to change the scene page. Start with SCENE and STOMP, then choose this combined view when it suits your playing.
Before playing live
Check the page you will use at the actual screen size and orientation, then test your MIDI foot controller. If audio is interrupted by a call, lock or disconnection, follow the status guidance and use Resume when requested. Test recovery with monitors turned down.